


Having looked at all of the models available at the time (early 2019) I eventually plumped for the Kokopelli Nirvana Self Bailing. I felt this was the best compromise between being light enough to strap to the bike and able to carry my 100kg pie eating and beer drinking body, plus a fully loaded bike. I knew from previous cycle touring experience that my camping gear, food for a few days and other bits could easily clock up 30kg. Add another 15kg on for a bike and I needed something which would be ok with 145kg. The Nirvana is rated for slightly less than this (136kg), but a quick email exchange with one of their techs told me that it could happily deal with much more – they state weight limits overly cautiously for white water – on flat-ish water you can comfortably push this upwards substantially.

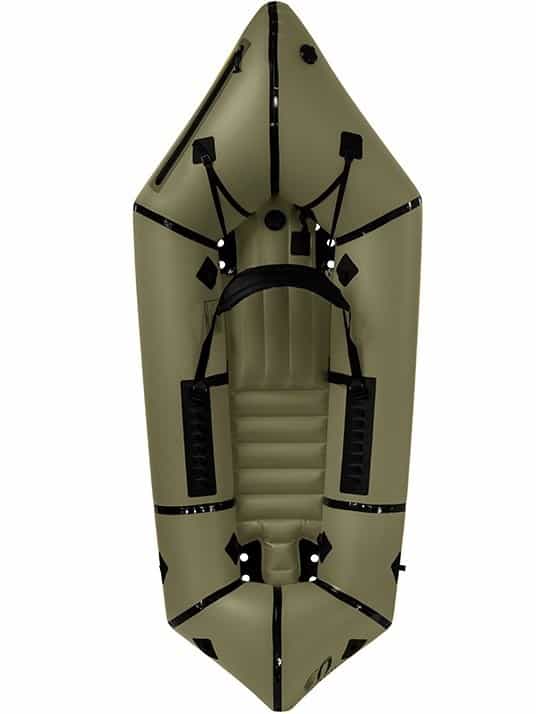
There are multiple options for each raft depending on where you are going to be paddling, how dry you like to stay and where you want to carry your gear. I went for the model with internal gear storage in the raft pontoons, accessed via the TZip and a self bailing setup.
One word of warning; These are not cheap. North of £1000 for the raft and then add on a decent paddle (£200), some additional straps and a mid range but lightweight pfd (£100).
When the raft arrived I also invested in a higher backed seat for it. Experience of paddling inflatable kayaks suggested that my lower back would suffer from prolonged paddling with the provided back band. In actual fact this turned out to be unnecessary, but you can read about that in my next article on my first bikerafting trip to France.
Again, further internet research revealed a suitable paddle. I chose a Werner Skagit. A lightweight but strong carbon shaft paddle which breaks down into 4 pieces – something which is essential for strapping to the bike in some sort of orderly fashion.
continue reading on page 2…
…continued from page 1
My next task was to look amongst my bike collection to see if I had anything suitable for the task. The answer was no, so I set out to research a new hardtail at a decent price which would be tough enough to tackle some trails with a full load, but not too heavy to strap to a raft.
After much deliberation and hundreds of reviews I decided on a Whyte 905 2019 model – again a good compromise of balancing all the features on my tick list;
- Less than £2000
- Less than 15kg
- Rugged
- Looks great
- Tubeless rims
- 1x drive
- Suitable for loaded and unloaded riding so I could take it on some trails and downhills when not touring.
When I went to my local bike shop just for a test ride and a nosey it turned out they had a 2018 model in my size at a significant discount, so I picked it up for £1000 and chucked it in the boot of the car.

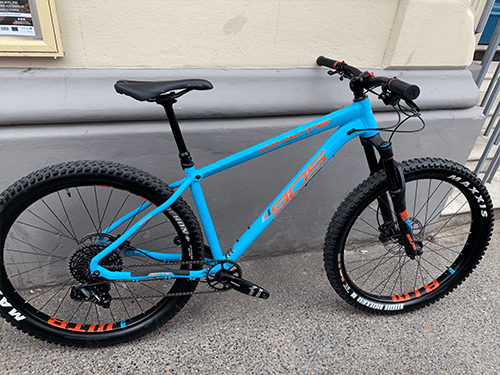
A slightly spontaneous purchase but as soon as I sat on it the geometry just felt right. Riding it feels like I’m 10 years old again and can throw it around without fear. Precisely what a hardtail should feel like in my book.
Having only done pannier based cycle touring before I then needed to do some further research and shopping…once again my bank manager was sweating as I opened up a browser.
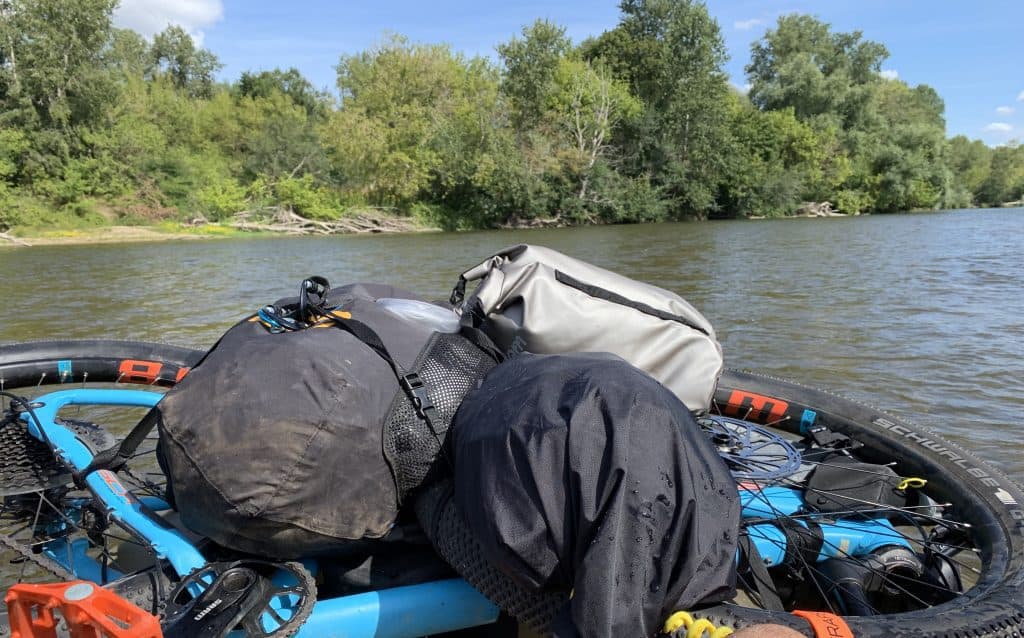
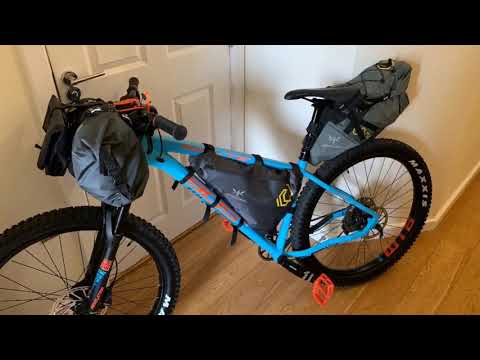
There are a whole range of bikepacking bags, packs, pouches, seat post racks, fork bags and many other terms used to make you feel cool and a bit special about the process of basically strapping luggage to your steed.
I will detail some of the gear I purchased and used in other posts. My initial setup was an Ortleib Handlebar Pack combined with Apidura Expedition Full Framebag and Backcounty Saddle Pack. A quick email exchange with the guys at Apidura confirmed that I could fit the 7.5Litre Framebag on my new bike and true to their word it fits with no problems – other than my desire to stuff 8.5 litres of gear into it.
My experience of cycle touring has taught me not to mess around with saving a few pennies here and there when it comes to luggage – especially when it comes to waterproofing. It’s a false economy. Buy well and buy once.
continue reading on page 3
…continued from page 2


I also forked out (excuse the pun) for a pair of Gorilla Cages to affix to the front forks of the bike – these were paired up with couple of DOM Dry bags to stash my clothes and wash kit in.
Re-configuring the load on the bike this way allowed me to reduce the backpack requirement to almost nothing – just a dryback backpack which contained those important items I wanted with me at all times – phone, passport etc…


My next consideration was weight. not mine = I like pies and beer too much to compromise much there, but I did strip all luxuries from my load. The only exceptions to this were a flask of Jameson’s whiskey and my Kindle. To me those fit the “essentials” bracket, not luxuries at all.
Now happy with my loadout, I was ready to head to France to put it all to the test in my first bikepacking adventure.
As I said at the start of this article – I don’t think there is a “right” or “wrong” in this – unless you load up so much that your raft sinks. It has been a bit of trial and error for me. Lots of reading of other peoples ideas and just figuring out what works for me, what I am comfortable riding and paddling.